Introduction
Accurate electrodermal activity (EDA/GSR) recording depends primarily on correct electrode placement on the respondent's hand and stable contact. Small errors in how we position and angle the electrodes, or how we support the hand and cables, can negatively affect an entire session. These mistakes can cause flat lines, saturated areas, or spikes from movement that appear to be real reactions. This lesson outlines a single, repeatable procedure for the Shimmer3 GSR+ using finger electrodes and explains why each step is physiologically significant, enabling learners to both execute and evaluate their own setup.
Glossary:
Skin conductance:
Skin conductance measures the ease with which a small electrical current flows through the skin. It increases when sweat glands, primarily located on the palms and fingers, are activated by the sympathetic nervous system during arousal, such as stress, surprise, or focused attention.
GSR (Galvanic Skin Response):
An older but still widely used term for skin conductance. It refers to the same physiological process, measuring changes in the skin's electrical conductance as a function of sweat gland activity.
EDA (Electrodermal Activity):
The broader scientific term that includes both tonic (slow, baseline) and phasic (rapid, event-related) components of skin conductance. EDA and GSR are often used interchangeably, though EDA is preferred in current psychophysiological research.
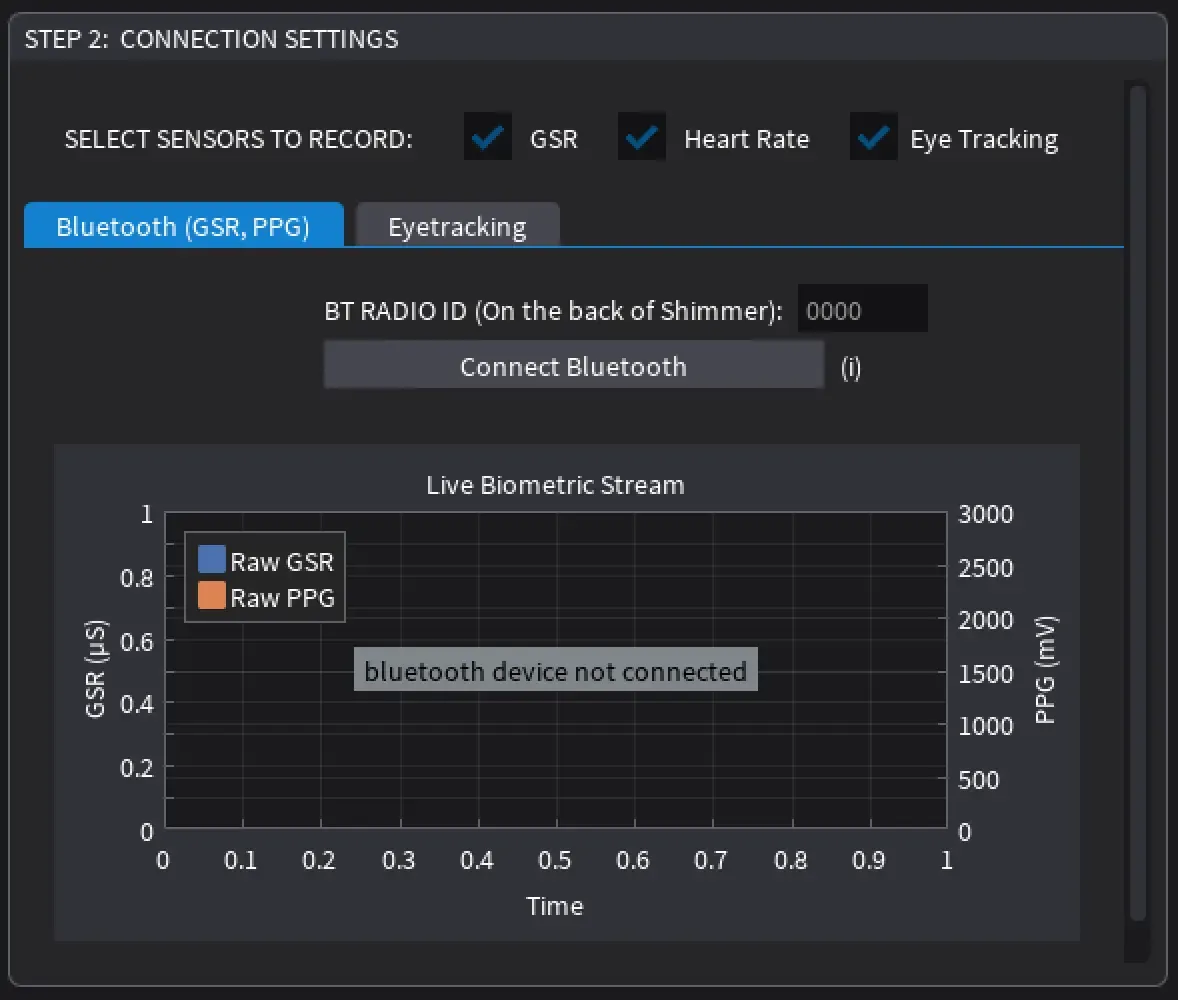
The Shimmer3 GSR+ measures skin conductance using two electrodes. Skin conductance increases when our sweat glands become active due to stress. The best place to connect the electrodes is on the index and middle fingers of the same hand, specifically on the palm side at the middle segment of the fingers. This spot works well because it has many sweat glands and allows for less movement compared to the fingertip. It's essential to use only one hand, as using both can alter how signals travel and cause unnecessary movement. It's best to use the respondent's non-dominant hand to minimise accidental movement. The straps should be tight enough to keep the sensors in contact with the skin without causing pain or indentations. If the straps are too tight, they can lower the signal quality, while if they are too loose, the sensor can slip, causing shaky readings.
Participant Setup:
The setup proceeds as follows: First, seat the participant comfortably with their forearm supported and the selected hand resting on the table. Ensure the cables have enough freedom so they don't pull on the fingers during normal breathing or small movements.
First, attach one electrode to the inner skin of the index finger at the middle joint. Then, attach the other electrode to the inner skin of the middle finger at the middle joint. Make sure that the entire sensing surface is flat against the skin.
Once the electrodes are in place, verify that the Shimmer device is selected and connected to the biosignal platform. When connected, a live feed of the data will appear. Before starting the actual test, observe the graph for a two-minute session while the participant focuses on something neutral to minimise hand movements. A valid baseline should show a slowly drifting tonic level with small fluctuations. A flat line indicates poor contact or an incorrect channel, while a jagged line suggests movement.
After establishing the baseline, create a brief, controlled moment of attention to verify that the system is responsive. For example, once the two-minute baseline is complete, the analyst may ask the participant a short, neutral question ("What day is it today?") or tap lightly on the table to elicit a mild orienting reaction. A small rise followed by a gradual return to baseline within a few seconds confirms that the electrodes are correctly attached and that the signal reflects changes in arousal. If the graph remains completely flat or displays irregular spikes, the setup should be adjusted before continuing with the actual test.
Recognising a Bad Signal
Identifying and correcting artefacts is crucial for obtaining accurate galvanic skin response (GSR) measurements. Sudden spikes or high-frequency "fuzz" typically result from micro-movements of straps or cables and do not represent genuine physiological changes in GSR, which occur gradually. Similarly, flattened traces usually indicate incomplete electrode–skin contact or misplaced sensors. Slow, steady drifts may reflect changes in local skin moisture beneath the electrodes rather than meaningful arousal; these can be reduced by maintaining consistent placement, stable temperature, and avoiding unnecessary rewrapping during the session.
To address these issues, re-seat the electrodes on the specified finger segments, adjust the strap to eliminate wobble without overtightening, restore any necessary cable slack, re-establish the baseline, and repeat a short test cue to confirm responsivity before beginning any trial.
The student case study on "Interconnection" has demonstrated how the correct and incorrect placement and use of electrodes can impact a study. Students measured Galvanic Skin Response (GSR) during a work-in-progress episode viewed on a laptop with studio headphones, simulating the intended distribution context. Out of approximately fifteen sessions, only nine were usable. The unusable sessions were characterised by flat signals or noise caused by movement, which stemmed from inconsistent mounting and poor cable management.
By following the correct procedures outlined above, you can ensure that your sessions are effective and that the data collected is reliable.
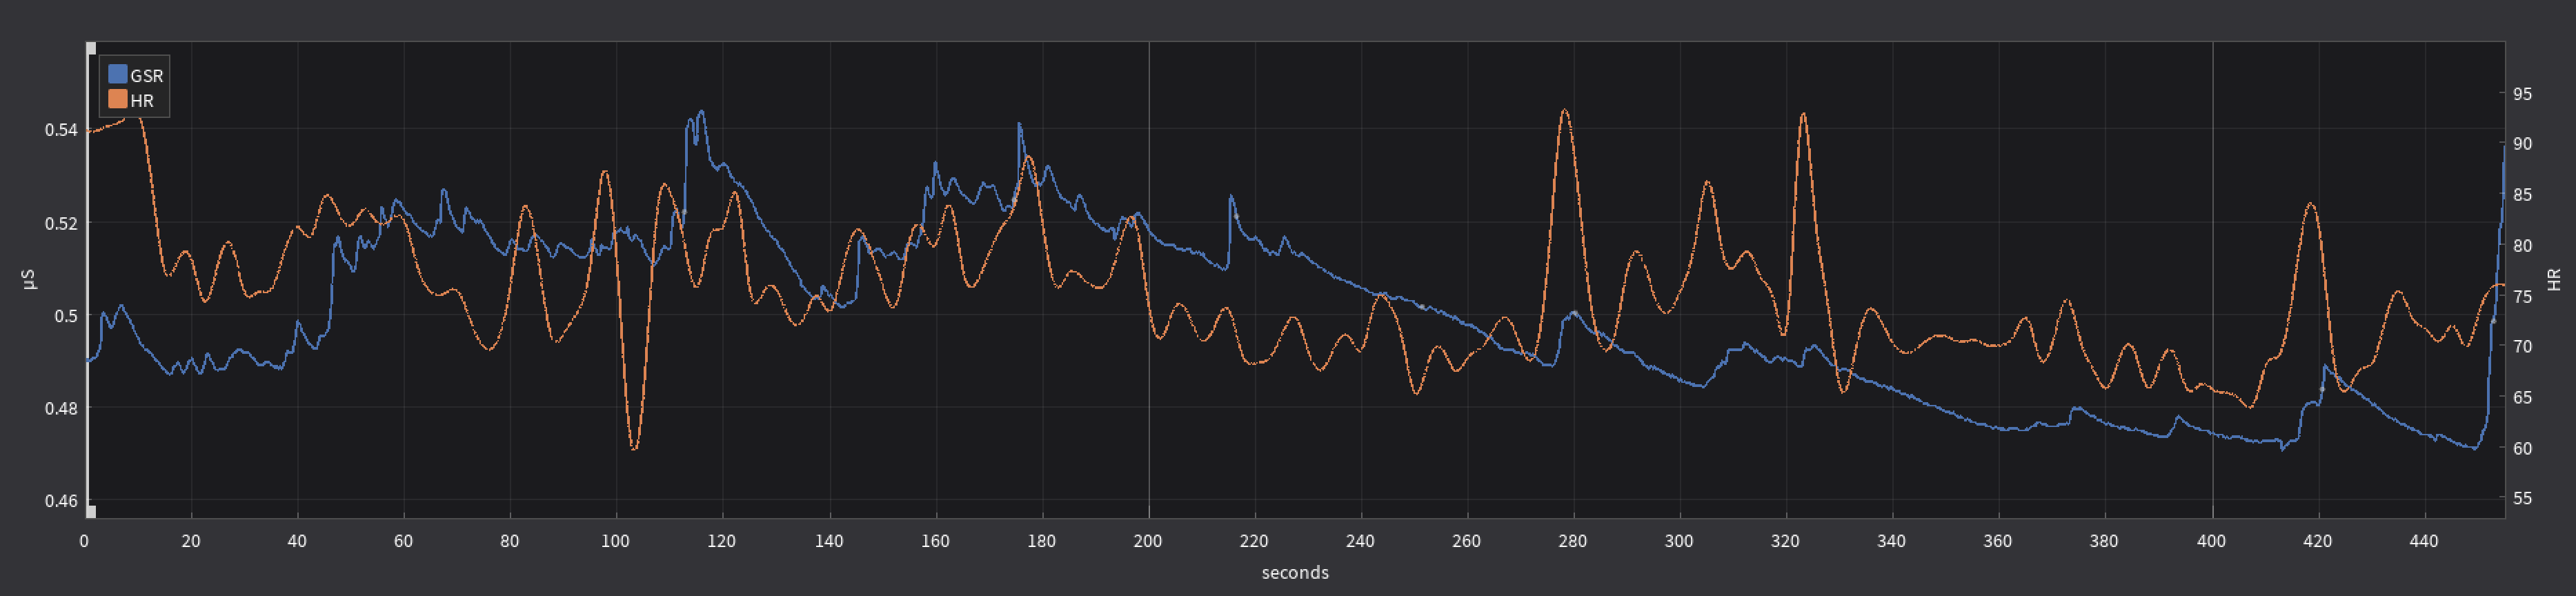
An example of a correct GSR line (blue) recorded together with heart rate (orange). The GSR signal shows a smooth tonic trend with smaller phasic peaks corresponding to moments of increased arousal, while heart rate varies more rapidly. The absence of abrupt spikes or flat segments indicates proper electrode placement and stable contact throughout the recording.
In the Interconnection case study, the data measurements provided producers with valuable insights into how audiences emotionally responded to specific moments in the episode. The data indicated that the opening car chase generated significant peaks in arousal, confirming that this sequence successfully captured viewers' attention. On the other hand, the first meeting between the two main characters evoked little response, suggesting that the emotional impact of this scene was weaker than intended. This finding helped the creative team identify where additional sound, music, or pacing adjustments could make the scene more engaging.
The study also revealed that different people reacted for various reasons. Some peaks in the GSR graphs were due to the acting performances, while others were related to missing sound or visual details. When compared with the participants' written comments, the physiological data allowed the producers to differentiate between technical issues and storytelling effects.
In practice, this meant that the GSR results became an objective reference point during post-production. Rather than relying solely on subjective feedback, the team could clearly see which scenes triggered strong or weak physiological reactions and use this knowledge to refine the editing process.